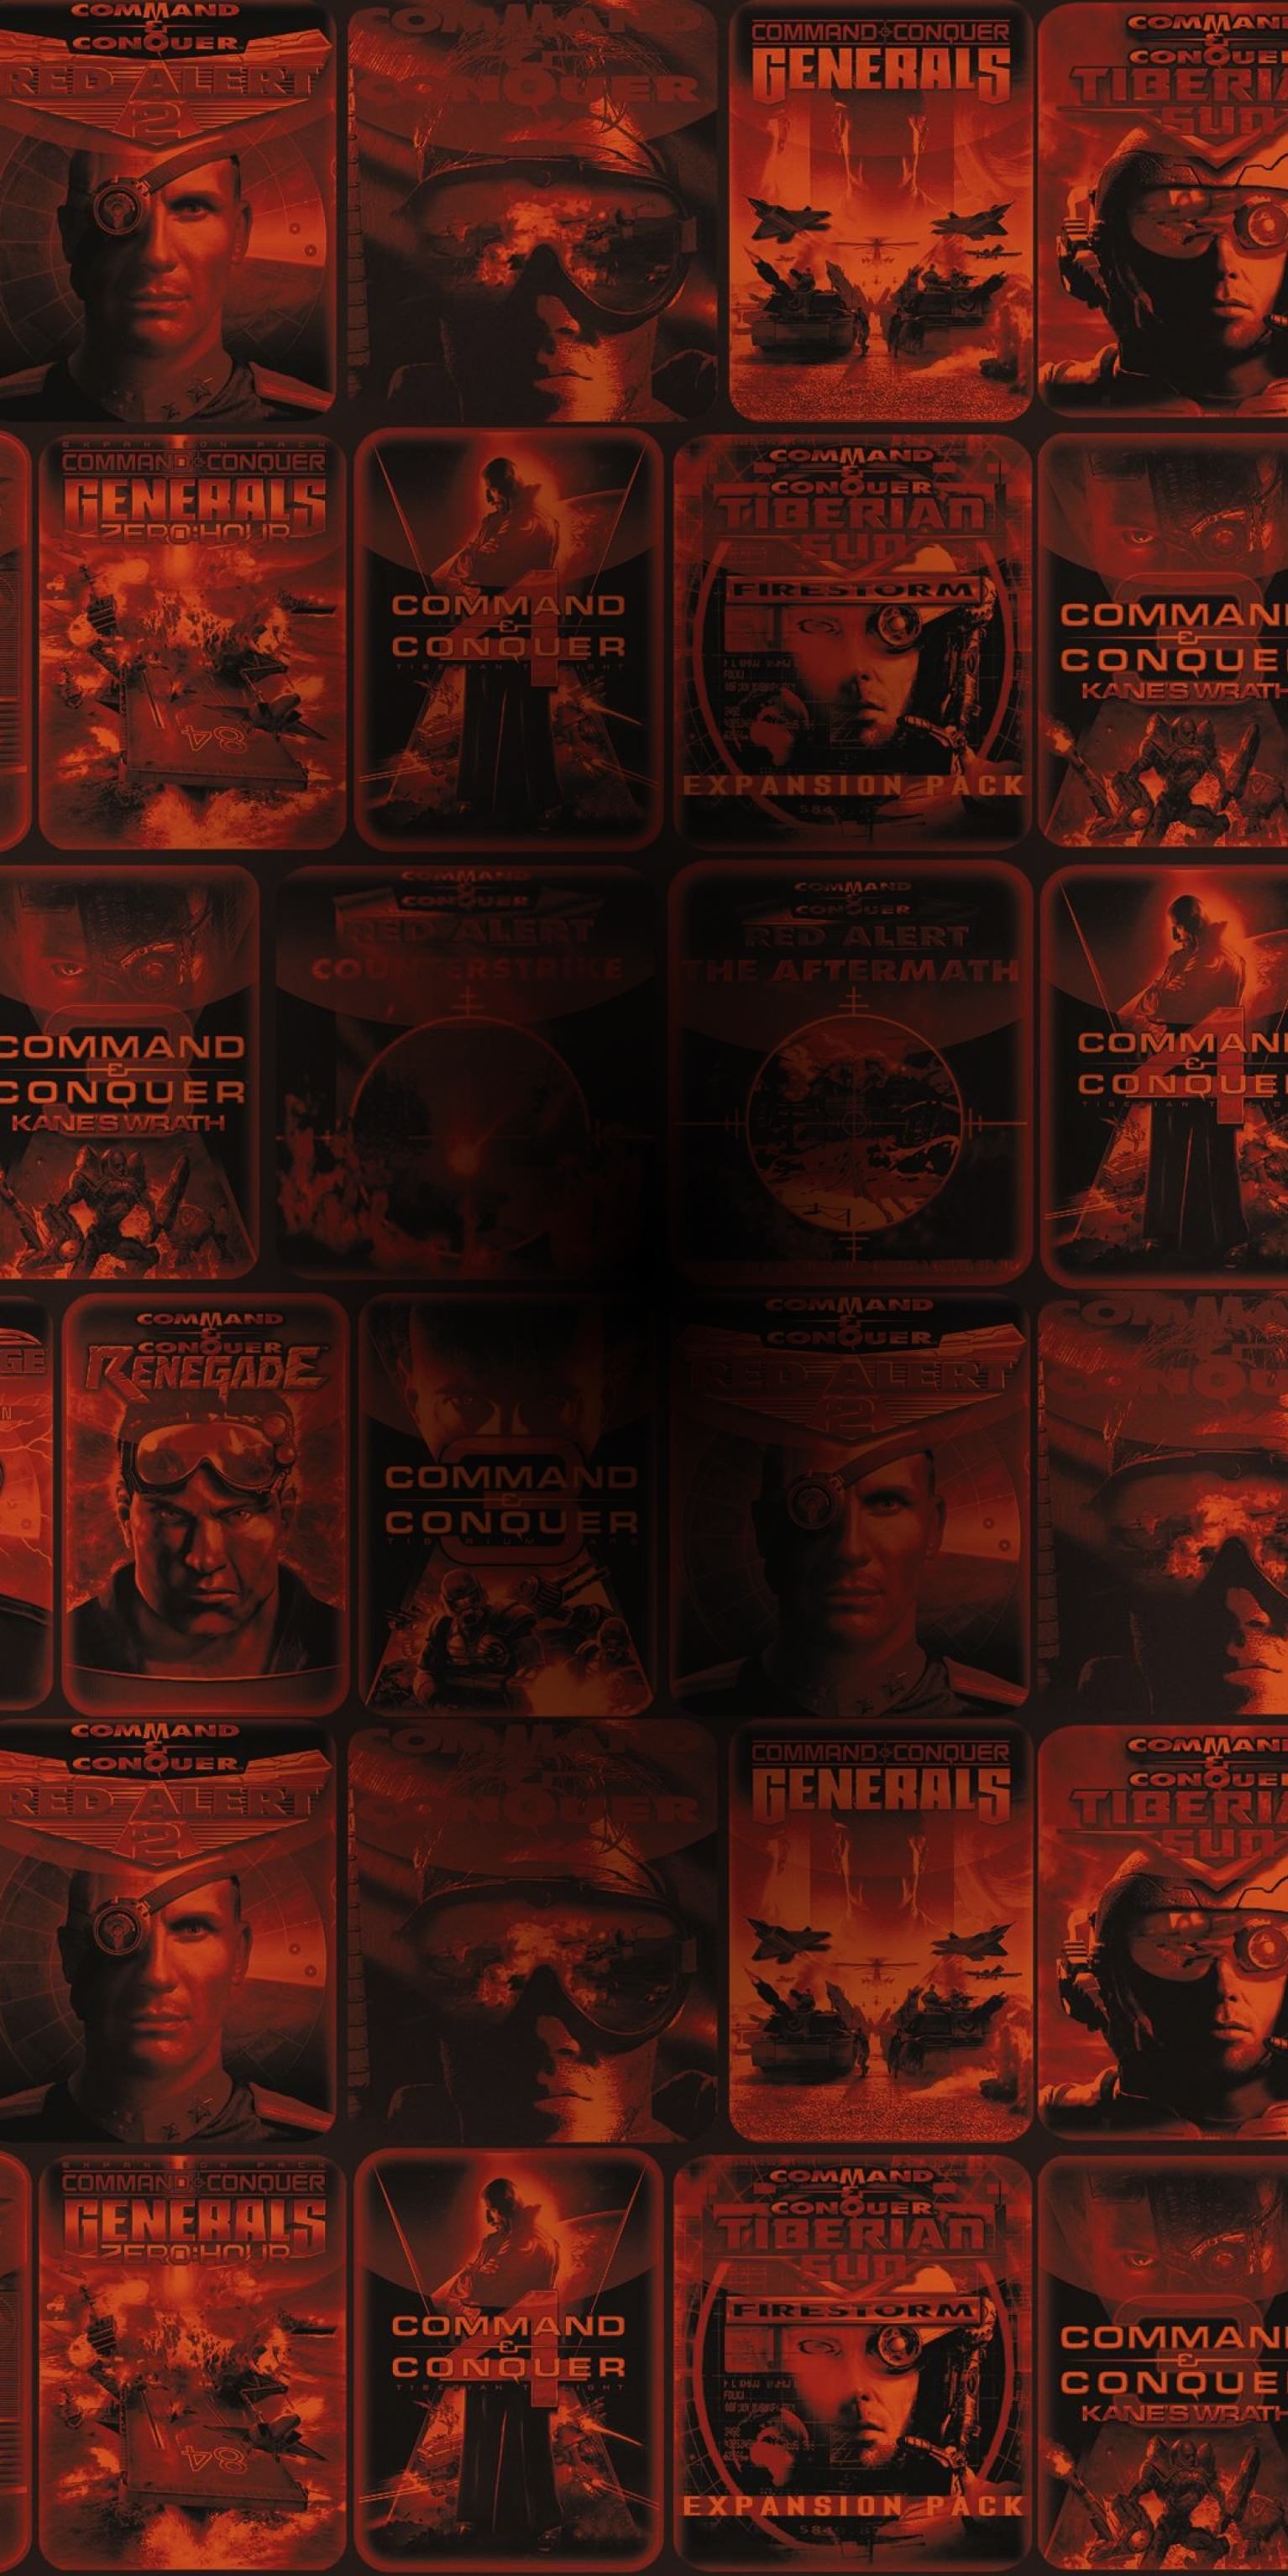
News

BETA UPLINK SERIES PART 7: MAP STRATS!

Commanders!

The Fourth Tiberium War will soon be upon us, but why wait to get in on the action? If you're planning on picking up the epic finale to the Tiberium saga, then you absolutely have to pre-order C&C4 today

When you pre-order, you will also get access to our exclusive multiplayer Beta! We will be spotlighting everything you need to know about Tiberian Twilight's new multiplayer features in our weekly Command & Conquer 4 Beta Debrief. Come back every Wednesday for insider tips and feature articles on our multiplayer beta. We'll be covering class-specific strategies, tier 3 units, map design, the upgrades system, and much more. Today, we'll take a look at our map designs and how to take advantage of their layouts to bring your team victory!

BETA UPLINK SERIES PART 7 – MAP DESIGNS AND STRATEGIES

Here are just 4 of the many 5v5 Domination Mode maps that will be shipping with Command & Conquer 4! Check out each of our 4 environments below, complete with Developer strategies:

  • Green and Blue Enlarged Tiberium Crystals indicate Indris Corporation crystal drop zones. Harvesting these Tiberium crystals will award your team upgrade points.
  • Red circles indicate TCN Hub locations (5 in total). Controlling more TCN Hubs than the enemy will grant your team victory points. 2,500 Victory Points wins a match.
  • SPAWN represents starting zones for each team. Units build slightly faster in spawn locations.

Ice Station Omega (Arctic)

{DESIGNER KEYS TO VICTORY}

  • Because of the unusual placement of the spawn zones, the central Uplink Tower and TCN Node #1 are the keys to controlling the enemy and bottlenecking them.
  • Although initially each team has two safe Crystals, whoever controls the central Uplink Tower (and thus a forward spawn point) can threaten the enemy Crystal gatherers.
  • It is essential to capture the Uplink Towers on the far side of the map. Failure to do so will lead to very long reinforcement times and possibly bottlenecking.
  • Beware of overemphasizing the middle. It may restrict enemy movement but it provides you no victory points.

Searing Mesa (Desert)

{DESIGNER KEYS TO VICTORY}

  • The two southern TCN nodes are on mesas with only two ramps leading up to them, making them prime positions for Defense players to entrench. Used wisely, these mesas can also help in controlling the Blue crystals if a Defense Crawler unpacks near the southern cliff and create turrets below their elevation to help block off the access routes. The Defense Class can build up and down elevations near their Crawler.
  • Each team has a Tunnel Network connecting the north and south edges of the map. Use these structures to aid allied forces in controlling the Uplink Tower / Gun Turret on the southern tip of the map, or, in fighting for the Green Tiberium Crystal and the TCN Node in the northern section of the map. Keep in mind that each Tunnel Network is in close proximity to an Uplink Tower to lessen the time to create reinforcements.
  • The northern TCN node #1 is arguably the most valuable because it is easy to defend both the node and the Green Crystal that spawns there.
  • Unlike other maps, there are relatively no “safe” crystals on Searing Mesa. Although there are Blue Crystal closer to each spawn zone, these can easily be denied by the other team as long as they control the southern Uplink Tower.

Afflicted Arena (Polynesia)

{DESIGNER KEYS TO VICTORY}

  • Afflicted Arena is unique in that the spawn zones are in the center and all of the points of interest radiate outwards. This makes the map feel very large and more difficult to maneuver around.
  • The middle, despite its Blue Crystal, is not as important as the ring around the map. Be wary of committing too many resources there as the Blue Crystal spawns only once every minute.
  • The tech structures are key on this map. Controlling the Uplink Towers and the Artillery Turret can hamper your opponent’s maneuverability.
  • TCN Node #1 can be contested by both teams but is very far out of the way. Keep in mind that sending reinforcements to this location will leave you very vulnerable elsewhere.

Lost Valley (Junktown)

{DESIGNER KEYS TO VICTORY}

  • The cliffs that run east-west down the center effectively divide the map into north and south zones. Control of the two chokepoints can nearly secure half the map.
  • The north half of the map is largely safe, with both teams most likely securing their near TCN Node and Blue Crystal and then sending forces to fight over TCN Node #1.
  • The more open nature of the south half of the map will result in more brawls and tug-of-wars between TCN Node #2 and #3. Control of the Mutant Hovels will also be extremely valuable in dictating the pace of the action as the whole team can instantly build reinforcements when needed.
  • Be careful of the Green Crystals in the southern half. Most reinforcements will have to go past them to get to the battle and a devious Commander can detonate them on an unsuspecting army.

[Developer Q&A]

1. Keeping C&C4’s new gameplay mechanics in mind, what needed to be considered when designing new maps?

With C&C4’s new gameplay mechanics, it was no longer valid to design maps for 1v1 and follow the formula of placing natural expansion point 1, contested expansion point 2, and so on. The maps had to be bigger, better, and had to allow players freedom to choose how they want to play. We had to take a fresh approach and, unlike any other C&C title we’ve done before, the maps had to be heavily scrutinized for balance since the constant push-n-pull effect of the game can be determined by the smallest difference on the maps themselves.

In designing these maps, we had to determine ways of creatively making choke points where Offense could push through, cliff-climbing passability where players could use specific units to bypass zones, key locations for the utility of the Support Class, create tighter zones for turrets for the benefit of the Defense class, etc. Each of these Classes were weighed and measured on each map, and, players can be confident that no matter which class they are, the maps themselves will not be a detriment to their play style.

In creation of these maps, we wanted players to experience the thrill of what could happen with 4 other teammates, but also wanted 1 person to be able to make a difference. If that 1 player sneaks into enemy territory and captures an Uplink Tower / Mutant Hovel, the tide of battle can turn if a coordinated team uses that opening to deploy their Crawler or creates a massive force of the Forgotten to flank the enemy from behind.

2. What strategies were used in determining the location of TCN hubs?

One of the main strategies in determining the location of the TCN Hubs is in relation to other important points of interests on the map. There is almost always 1 safe TCN Hub that can be defended easily by re-deploying in the original spawn zone. Many times, the 3 other ‘hot’ locations are spread out in a way that is balanced and accessible by at least 2-3 different lanes.

We also wanted to make sure that there is almost always an Uplink Tower that’s closer to a few of the TCN Hubs than the starting deploy zones. These Towers are one of the most important points of interests, as they can sway the game in favor of the team that controls them.

Helpful hint: Offensively taking your enemy’s forward deploy zone is a major way to "deny" them a portion of the map. Think about what a backdoor tactic executed by some of your teammates could do to your opponents? One of my favorite strategies at the beginning of the match is sending 1-2 units to an Uplink Tower that is considered “safe” for the enemy. After the creation of those units, I immediately delete my Crawler and, by the time the Crawler detonates, my units will have captured the enemy Uplink Tower. I then re-deploy at the newly captured Uplink Tower and start stealing / denying Tiberium Crystals and capturing the unsuspecting player’s TCN Hubs.

3. In what areas do Tiberium Crystals generally spawn?

Tiberium Crystals are one of the early ways to sway the game in your favor, especially the much heeded blue crystal. Each map can be determined by Points of Interests and, our internal stats are weighed so that TCN Hubs and Tiberium Crystals are not all concentrated at a single location or dominant at the same portion of the map. Each team usually has 1-2 "safe" green crystals that can be easily defended, but, they must pay attention to them or they can be overrun.

Acquiring these crystals have a designed “time-cost” that the player must pay attention to in relation to other points of interests on the map, thus, they are placed in locations that players must take time to acquire. Since TCN Hub acquisition is determined by the amount of CP within the capture radius, that 1 unit slowly capturing the crystal may be the CP your team needed to sway the TCN Hub.

Also, some Tiberium Crystals are also placed a bit closer to the pre-placed defense turrets. If detonated correctly, one Tiberium-created Ion storm can decimate an entire group of turrets and provide victory points/permanent progress on the map.

4. How do pre-placed base defenses and structures add a new mechanic to the maps?

Pre-placed defenses, especially in the early part of the game, provide safety to some key locations, whether guarding specific choke points, TCN Hub, Tiberium Crystal, etc. There are also pre-placed defenses at each starting location to prevent spawn camping by the opposing team. Each cluster of defenses can also be used as a fall-back location for when your units need to retreat to a semi-protected area.

For the opposing team, not only do they these become a permanent way to make progress and gain a bit of map control, but, they also provide Victory Points for the enemy upon destruction.

5. We brought in some of our top Kane’s Wrath and Red Alert 3 e-sport players to help balance test the game and maps. How influential were they in future map designs?

The external balance team was a great resource in determining the specific characteristics of each map and their strengths/weaknesses in varying gameplay. From there, we determined the rotations for both the PVE-Ladder (player vs. computer) and the PVP-Ladder (player vs. player) from the features they highlighted on each map.

They definitely made an impact on future map design, especially in terms of providing elements to circumscribe the impact of "the middle" of the map. Though many new players consider the middle of the map to be the most important part, looking at it in a holistic view (as many RTS veterans have figured out) will make up-and-coming players realize that the key locations are actually away from the middle. Originally, the center of the map was far away from several other Points of Interest, so it seemed obvious for many teams to focus on capturing it. Now, you are no longer a minute and a half away from every other Point of Interest, so focusing your forces away from the center allows you not only to flank the enemy, but capture Forward Spawn Zones and other TCN Hubs along the way.

Previous Beta Uplink Series:
Beta Uplink Series Part 6: Tier 3 Units
Beta Uplink Series Part 5: Tiberium
Beta Uplink Series Part 4: Support Class
Beta Uplink Series Part 3: Defense Class
Beta Uplink Series Part 2: Offense Class
Beta Uplink Series Part 1: Multiplayer Overview

PRE-ORDER COMMAND & CONQUER 4 TODAY
TO GAIN INSTANT ACCESS TO THE BETA!